Adobe InDesign - Working With Text and Image Frames, Adding Static Captions (Skillshare)

Offered by Skillshare,
Adobe InDesign - Working With Text and Image Frames, Adding Static Captions (Skillshare)

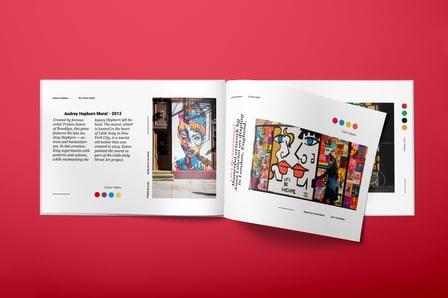
In this four-part #Adobe InDesign lesson, you will learn how to create threaded frames to easily flow text into different columns when importing text files into a layout. You will also learn how place multiple images into a grid of frames in a project, add static captions to them as well as build a color palette using InDesign's Color Theme Tool.

Part 1 - Create Threaded Text Frames

  1. Click the Type Tool and draw a frame on the workspace, only when you left click and drag, also tap on the right arrow key on your keyboard once to increase the column thread.
  2. You can continuously tap on the right arrow key to add the more columns to your frame. Don't worry, if you added too many columns, tap on the left arrow key to draw back.
  3. Go to File > Place to choose a text file to import and you will notice the type will flow nicely in the threaded frames that you created.

Now, what if there is overset text and you want to carry over the copy to another frame? If you have text that will jump from one page to another or multiple pages, repeat the same process to add threaded frames. Only, before you import the text, link all the threaded frames by going to the bottom right-hand corner of the text frame and clicking the out port icon (little white square) and clicking the next threaded frame to link the two.
You also have the option to import the text and link the threaded frames after to jump the copy to another page(s).
Part 2 - Color Theme Tool

  1. Place an image on your page by going to File > Place to import an photo or simply drag an image from your desktop or CC Library.
  2. Select the Color Theme Tool. It can be accessed in the Eyedropper Tool flyout or using Shift + I as a shortcut.
  3. With your Color Theme Tool, click inside the image you want to sample colors from. This will build a color swatch theme for you.
  4. Next to the colour lineup, InDesign allows you to select a different theme — Colorful, Bright, Dark, Deep and Muted.
  5. When you are satisfied with your colors, click the icon to the right of the theme selector to to add the swatch group to your Swatches Panel.

Part 3 - Placing Images into a Grid of Frames

  1. In a separate folder, save at least four images to place into your project
  2. Go to File > Place and select the images from the folder in which you saved them. Either drag and select, or command-click to choose each file individually. Click Open.
  3. Your cursor will become loaded with the images you selected. Use the left or right arrows on your keyboard to toggle through.
  4. Click and drag to draw out a frame, but when doing so, also press the up arrow key once and the right arrow key twice. This will evenly divide your frame into four boxes that will contain the images you selected. Before you release the mouse, adjust the frames roughly to your preference.
  5. Release the mouse and your images will automatically drop into the grid of frames in order of how you initially selected them.

Part 4 - Adding Static Captions
Note: Before anything, you must add descriptions into the Metadata information field of your images. This can be applied through such applications like Adobe Bridge.

  1. Select the images you want to apply captions to and go to Object > Captions > Caption Setup.
  2. In the Metadata selection dropdown menu, choose Description.
  3. Apply an offset so when you place the captions, they aren't touching the actual images. In this case, I applied a 0.5" offset, but experiment with what works best for you. Click OK when finished.
  4. With your images still selected, go back to Object > Captions and choose Generate Static Caption. This will apply the Metadata descriptions into text frames that are now built-in captions.
Go to Class
MOOC List is learner-supported. When you buy through links on our site, we may earn an affiliate commission.

Related Courses

3D Printing: Solving Problems Through Product Design  (Skillshare) Skillshare
Skillshare

3D Printing: Solving Problems Through Product Design (Skillshare)

Invent your very own product! Join Lauren Slowik (Design Evangelist, Shapeways) to create a 3D printed object that solves a problem in your morning routine. She takes you through the steps of identifying an everyday problem, sketching a solution, making a simple 3D digital rendering, and printing your final product. Lauren shares how she iterates and evolves her plans to get the design just right — all so you can do it, too.

Self Paced
Self-Paced
Design A Rocket Logo! Practice Your Logo Design Skills (Skillshare) Skillshare
Skillshare

Design A Rocket Logo! Practice Your Logo Design Skills (Skillshare)

Do you want to learn how to create a logo that is out of this world? In this class we will put together a logo in Adobe Illustrator that will help you practice and develop and fine tune your vector skills. We will practice using the shape builder tool to make complicated shapes very easy to create. We will use flat design and learn how to add dimension highlights to our logo with ease.

Self Paced
Self-Paced
Get Discovered With a Knockout Portfolio (Skillshare) Skillshare
Skillshare

Get Discovered With a Knockout Portfolio (Skillshare)

Over the last couple of years, having an online portfolio has gone from a nice-to-have to a must-have for any creative professional — and Behance is leading the charge to make it possible. In this class, we’ll walk through their list of best practices on how to make a good portfolio great and how to get you and your work discovered in the creative communities you care about. You'll leave this short class with a list of tips on getting an online footprint that shows off who you are, tells the world what you can do, and gets you found.

Self Paced
Self-Paced
Build an Online Shop: Design and Launch Your Own Big Cartel Store (Skillshare) Skillshare
Skillshare

Build an Online Shop: Design and Launch Your Own Big Cartel Store (Skillshare)

Big Cartel helps artists, makers, and other creatives sell their work online. In this 40-minute class, you’ll learn how to set up and customize your own online shop with Kate Miss, an independent jewelry and graphic designer who works with artists all around the world to create successful Big Cartel shops.

Self Paced
Self-Paced
People and flowers in watercolor style in Procreate - digital tutorial for beginners + free brushes (Skillshare) Skillshare
Skillshare

People and flowers in watercolor style in Procreate - digital tutorial for beginners + free brushes (Skillshare)

Let’s paint all together cool illustrations of girl on a bicycle in watercolor style. You can use the illustrations you create for posting in Instagram, add it to your portfolio and so on. Or just share it with someone whom you really like. I am sure they will be so happy to get an illustration that is created by you. Today I want to show you that watercolor is so simple and it’s a real fun!

Self Paced
Self-Paced
How to create watercolor digital sticker pack in Procreate + free brush (Skillshare) Skillshare
Skillshare

How to create watercolor digital sticker pack in Procreate + free brush (Skillshare)

Today I will teach you: how to create your own digital sticker pack that you can sell on different art platforms; how to save watercolor picture with transparent background (how to separate your painting form textured background); How to create cover picture for your sticker set and how to locate different elements on the canvas in a beautiful way; how to paint flowers in watercolor style; how to create texture paper; How to be ready for selling your own pictures.

Self Paced
Self-Paced
Packaging Design: Sketching Concepts That Surprise and Delight  (Skillshare) Skillshare
Skillshare

Packaging Design: Sketching Concepts That Surprise and Delight (Skillshare)

Join Evelio Mattos — editor in chief of beloved packaging design blog The Dieline — for a hands-on, one-hour class that gets to the heart of crafting packaging for real-world products! Creators, makers, and designers of all levels will love learning how to sketch an "unveiling experience" — unlocking the skills to get ideas down on paper and convey form, function, and features in a retail space.

Self Paced
Self-Paced
How to draw watercolor recipe in Procreate - digital illustration + free brush (Skillshare) Skillshare
Skillshare

How to draw watercolor recipe in Procreate - digital illustration + free brush (Skillshare)

Today I will teach you: how to draw recipe in watercolor style, where we will combine actually watercolor and pencil together; how to locate receipt elements on the canvas in a beautiful way; how to create texture paper; How to add decorations; where to get reference pictures that you can use for commercial and personal purposes.

Self Paced
Self-Paced